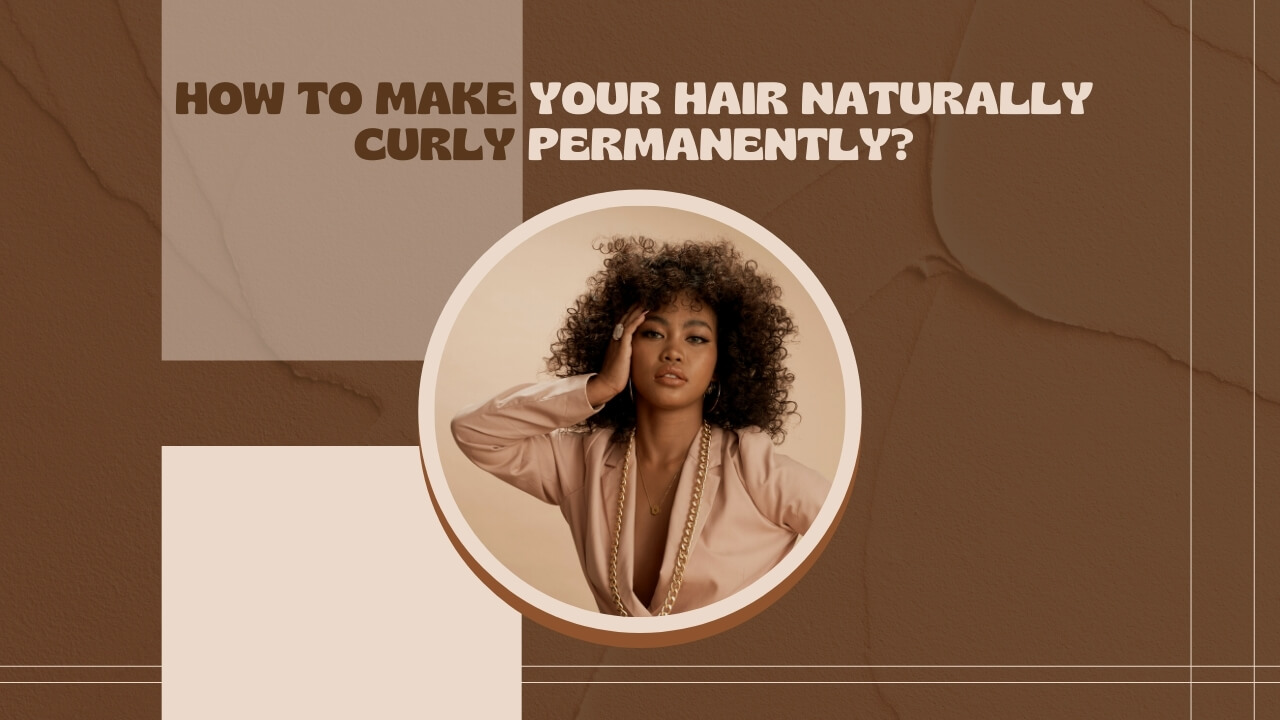
5 Ways to Make Your Hair Naturally Curly Permanently [Step by Step]
Curly hair has become one of the most sought-after hairstyles in recent years. Whether you have straight, wavy, or slightly curly hair, you might be wondering how to achieve lasting curls without constant heat styling or salon visits.
Getting naturally curly hair permanently isn’t just about one styling session. It’s a commitment that involves changing your hair care routine, using the right products, and being patient with the process. The good news is that several natural methods can help you bring out your hair’s curl potential or create new curl patterns over time.
| Photo | Popular Hair Product | Price |
|---|---|---|

|
Kkioor 24 Inch Chocolate Brown Human Hair Wig 200 Density Body Wave Lace Front Wigs Human Hair Pre Plucked 13X4 HD Frontal Wig 4# Colored Brown Wig For Women Glueless Wigs | Check Price On Amazon |

|
KingSup 613 Lace Front Wig Human Hair Pre Plucked 250 Density 26 Inch 5x5 HD Lace Closure Straight Blonde Wig Human Hair, 100% Real Human Hair without Synthetic Blend Tangle Free Triple Lifespan 3X | Check Price On Amazon |

|
WIGCHIC 16" Kinky Curly Half Wig Human Hair Burgundy & Dark Roots | Flip-Over Drawstring | Seamless 4C Hairline | True Length | 3-in-1 Styling | Beginner Friendly (T1B/99J) | Check Price On Amazon |

|
Hair Removal Cream for Men & Women: Painless Depilatory for Sensitive Skin & Intimate Areas, Moisturizing with Aloe Vera & Vitamin E, Safe for Face, Underarms, Bikini, Arms (3.7 Fl Oz (Pack of 2)) | Check Price On Amazon |

|
ZOOLY PROFESSIONAL Ginger Shampoo and Conditioner Sets 20.3 Fl Oz- Anti Hair Loss and Nourishes Hair Roots, Salon Level Scalp Care for Men and Women | Check Price On Amazon |

|
LUSN Baby Hair Clippers with Vacuum, Quiet Hair Trimmers for Kids, IPX7 Waterproof Rechargeable Cordless Haircut Kit for Baby Children Infant | Check Price On Amazon |

|
LURA Dual Voltage Travel Hair Dryer with Diffuser,Travel Blow Dryer Mini with EU Plug and UK Plug,Lightweight Portable Hairdryers with Folding Handle,1200W Compact Small Blowdryers for Women | Check Price On Amazon |
This guide will walk you through five proven methods to make your hair naturally curly permanently, plus important tips on maintenance, products, and what to expect based on your hair type.
Understanding Your Hair’s Curl Potential
Before you start any curling method, you need to understand your hair’s natural texture and curl potential. Not all hair types respond the same way to natural curling methods.
Hair Types and Curl Potential
Hair types are usually classified into four main categories:
- Type 1 (Straight hair): Has little to no natural curl pattern. Requires more effort and may need chemical treatments for permanent curls.
- Type 2 (Wavy hair): Has a natural S-shaped wave pattern. Responds very well to natural curling methods.
- Type 3 (Curly hair): Has defined curls or spirals. Natural methods help enhance and maintain existing curl pattern.
- Type 4 (Coily/Kinky hair): Has tight coils or zigzag patterns. Natural methods help define and stretch curls.
What “Permanent” Really Means
When we say “permanent” in natural hair curling, we mean training your hair to hold a curl pattern over time. This is different from chemical perms, which physically change your hair structure. Natural methods work by:
- Encouraging your hair’s existing curl potential
- Retraining hair bonds through consistent styling
- Improving hair health so curls form more easily
- Creating lasting habits that maintain curl patterns
Results typically become visible after 3-6 months of consistent practice. For completely straight hair with zero curl potential, natural methods may only create temporary waves, and you might need to consider a chemical curling method for truly permanent results.
5 Ways to Make Your Hair Naturally Curly Permanently
These five methods range from complete lifestyle changes to specific techniques you can use regularly. Choose the one that fits your hair type, lifestyle, and commitment level.
1. The Curly Girl Method
The Curly Girl Method, created by hairstylist Lorraine Massey, is the most popular approach for achieving natural curls. This method isn’t a one-time treatment. It’s a complete hair care routine that helps you reach your maximum curl potential.
Thousands of people have documented their Curly Girl Method journey online, showing dramatic transformations from straight or limp hair to defined, bouncy curls. However, it requires strict rules and patience, typically taking 3-6 months to see full results.
Who Should Try This Method
- People with naturally wavy or slightly curly hair (Type 2-4)
- Those willing to commit to a long-term routine
- Anyone dealing with frizz, damaged curls, or undefined waves
- People who want to avoid heat and chemical treatments
Core Rules: Do’s and Don’ts
Do’s:
- Use CG-approved shampoos and conditioners that are free of sulfates and silicones
- Co-wash (wash with conditioner only) once or twice a week instead of regular shampooing
- Apply products using a scrunching motion to encourage curl formation
- Use emollients like coconut oil, jojoba oil, shea butter, grapeseed oil, and olive oil
- Dry your hair with a microfiber towel, cotton towel, or cotton t-shirt
- Deep condition your hair weekly
- Detangle only when hair is wet and coated with conditioner
- Use a wide-tooth comb or your fingers to detangle
- Sleep on a silk or satin pillowcase to reduce friction
Don’ts:
- Don’t use regular shampoo containing sulfates and silicones
- Don’t wash your hair every day
- Don’t use any heat styling tools (blow dryers, curling irons, flat irons, or steamers)
- Don’t use products with silicones, sulfates, drying alcohols, waxes, mineral oils, or synthetic fragrances
- Don’t roughly towel-dry your hair
- Don’t brush or comb dry hair
- Don’t use chemical treatments like hair coloring, bleaching, or highlighting during your transition period
- Don’t touch your hair while it’s drying
CG-Approved Products for Making Hair Naturally Curly
| Product Type | Recommended Product | Purpose |
| Shampoo | MOPTOP Gentle Shampoo | Sulfate-free cleansing |
| Conditioner | Not Your Mother’s Naturals Tahitian Gardenia Flower Butter Curl Defining Conditioner | Moisturizing and curl definition |
| Hair Gel | Aveda Confixor Liquid Gel | Hold without crunch |
| Co-Wash Product | As I Am Coconut Cowash | Gentle cleansing without stripping |
| Cleanser | Devacurl No-Poo Original Cleanser | Non-lathering cleanse |
Step-by-Step Curly Girl Method Routine
Initial Reset Wash (First Time Only)
- Use a clarifying shampoo to remove all silicone buildup and product residue from your hair. This is the last time you’ll use sulfates.
- Rinse thoroughly with warm water.
- Follow with a deep conditioning treatment.
Regular Wash Day Routine (2-3 Times Per Week)
- Wet your hair completely with warm water in the shower.
- Apply co-wash or low-poo cleanser to your scalp. Massage gently with your fingertips (not nails) for 1-2 minutes.
- Rinse thoroughly, letting the product run down the length of your hair.
- Apply a generous amount of conditioner from mid-length to ends. Avoid the scalp.
- Detangle with a wide-tooth comb or your fingers while the conditioner is in your hair. Start from the ends and work up to the roots.
- Scrunch your hair upward toward your scalp to encourage curl formation.
- Rinse with cool water, or leave some conditioner in if your hair is very dry.
- Remove excess water by gently scrunching with a microfiber towel or t-shirt. Do not rub.
- Apply styling gel to soaking wet hair using the praying hands method (smoothing between palms) followed by scrunching.
- Air dry or diffuse on low heat if needed. Do not touch your hair while drying.
- Once completely dry, scrunch out the crunch by gently squeezing the hair to break the gel cast.
Expected Timeline and Results
- Week 1-2: Hair may feel different or look worse (transition period)
- Month 1: You’ll start seeing slight wave or curl formation
- Month 2-3: Curls become more defined and consistent
- Month 4-6: You reach your maximum curl potential
Common Challenges and Solutions
| Challenge | Solution |
| Frizz | Add more moisture with leave-in conditioner; use gel for hold |
| Limp curls | Reduce heavy products; try a lighter gel or mousse |
| Greasy roots | Co-wash less often; focus conditioner on ends only |
| Dry ends | Deep condition weekly; add hair oil to ends |
| Undefined curls | Apply products to soaking wet hair; use more scrunching |
2. Old-School Heatless Curling Method
The old-school method uses physical manipulation to create curls without heat or chemicals. While each individual styling session lasts only 2-3 days, doing this consistently 2-3 times per week over several months can train your hair to hold curls more easily.
This method is budget-friendly and flexible. You can use hair rollers, braids, twists, or even everyday items like socks and headbands to create different curl patterns.
Who Should Try This Method
- People with wavy to curly hair (Type 2-4)
- Those who want flexible styling options
- Anyone on a budget
- People who prefer not to follow strict product rules
- Those willing to sleep with hair rollers or protective styles
Items You’ll Need
- Foam or sponge hair rollers
- Hair bands or scrunchies
- Long socks or fabric strips
- Bobby pins or hair clips
- Sulfate-free shampoo
- Moisturizing conditioner
- Curl-enhancing mousse or gel
- Microfiber towel or cotton t-shirt
Recommended Products


Step-by-Step Instructions
Method A: Hair Rollers for Defined Curls
- Wash your hair with a sulfate-free shampoo. Focus on the scalp and let the suds rinse through the length.
- Apply conditioner from mid-length to ends. Leave it on for 3-5 minutes.
- Detangle thoroughly with a wide-tooth comb while conditioner is still in.
- Rinse with cool water to seal the hair cuticle.
- Remove excess water by gently squeezing with a microfiber towel or t-shirt. Hair should be damp, not dripping.
- Apply curl mousse or gel evenly throughout your hair.
- Section your hair into small portions (1-2 inches wide). Smaller sections create tighter curls.
- Roll each section around a foam roller from ends to roots. Secure according to roller type.
- Let hair dry completely. This works best overnight (6-8 hours) or for at least 4-5 hours during the day.
- Carefully remove rollers by unrolling, not pulling.
- Separate curls gently with your fingers. Do not brush.
- Set with hairspray if desired.
Method B: Braiding for Loose Waves
- Follow steps 1-6 from Method A.
- Divide hair into sections. More braids create tighter waves; fewer braids create looser waves.
- Braid each section from root to tip and secure with a hair tie.
- Sleep on braids or keep them in for 6-8 hours.
- Undo braids carefully and separate waves with fingers.
- Scrunch upward to add volume and definition.
Method C: Sock Curls for Bouncy Spirals
- Follow steps 1-6 from Method A.
- Take a long sock or fabric strip (12-18 inches).
- Place the sock at the end of a hair section and roll hair around it.
- Tie the sock ends together at your scalp to secure.
- Repeat for all sections of hair.
- Sleep with sock curls or keep them in for 6-8 hours.
- Untie and unwind socks gently.
- Scrunch and separate curls with fingers.
Important Precautions and Tips
- Always start with damp hair, never soaking wet or completely dry
- Use sulfate and silicone-free products to prevent buildup
- Wash your hair only 2-3 times per week maximum
- Perform this routine consistently 2-3 times per week for best long-term results
- Avoid heat styling during this training period
- Skip chemical treatments like dyeing, bleaching, or highlighting
- Sleep on a silk or satin pillowcase to reduce frizz
- Refresh curls on non-wash days with water and a little gel
Expected Results Over Time
- First week: Curls last 1-2 days
- First month: Curls last 2-3 days; hair starts holding curl pattern better
- 3-4 months: Natural wave pattern becomes more pronounced even without styling
- 6+ months: Hair develops lasting curl memory; easier to style and maintain
3. Egg Hair Masks for Natural Curl Enhancement
Eggs are one of the most nutritious foods you can use on your hair. They contain proteins, vitamins (A, D, E, B12), biotin, and fatty acids that strengthen hair and improve its natural texture.
The lutein in eggs specifically improves hair elasticity and curl formation. When used regularly as a hair mask, eggs can help bring out your hair’s natural curl pattern, add shine, reduce breakage, and improve overall hair health.
Who Should Try This Method
- People with wavy or slightly curly hair looking to enhance their natural texture
- Those with dry, damaged, or protein-deficient hair
- Anyone who prefers completely natural, kitchen-ingredient treatments
- People with fine hair that needs volume and texture
Understanding Egg Parts and Hair Types
- Egg whites: High in protein; best for oily hair and scalp
- Egg yolks: Rich in fats and vitamins; best for dry hair
- Whole eggs: Balanced nutrition; suitable for normal to combination hair
How Often to Use Egg Masks
- Normal hair: Once per week
- Dry or damaged hair: Twice per week
- Oily hair: Once every 10 days
Recipe 1: Simple Egg Hair Mask
This is the most basic egg treatment, perfect for beginners.
Ingredients:
- 1-3 eggs (depending on hair length)
- Optional: 1 teaspoon honey for extra moisture
Instructions:
- Crack the eggs into a bowl. Use only whites for oily hair, only yolks for dry hair, or whole eggs for normal hair.
- Beat thoroughly with a fork or egg beater until smooth and frothy.
- Add honey if using and mix well.
- Wash your hair with a gentle shampoo and rinse.
- Detangle completely with a wide-tooth comb while hair is still wet.
- Part hair into 4-6 sections for easier application.
- Apply egg mixture starting at the roots and working to the ends. Focus on the scalp and roots, as this is where natural oils can weigh down curls.
- Scrunch your hair continuously as you apply the mixture to encourage curl formation.
- Cover with a shower cap to prevent dripping.
- Leave on for 20-30 minutes. Do not exceed 30 minutes.
- Rinse thoroughly with cool water. Never use hot water, as it will cook the egg and make it difficult to remove.
- Follow with a gentle shampoo to remove any egg smell.
- Air dry your hair while scrunching periodically.
Recipe 2: Egg and Coconut Oil Hair Mask
This combination adds deep conditioning benefits. Coconut oil penetrates the hair shaft, reduces protein loss, and adds moisture.
Ingredients:
- 2-3 whole eggs
- 2-3 tablespoons coconut oil (melted)
- Optional: 1 tablespoon honey
Instructions:
- Melt coconut oil by placing the jar in warm water. Let it cool to room temperature before mixing.
- Beat eggs in a bowl until smooth.
- Add melted coconut oil and honey to the eggs.
- Mix thoroughly until well combined.
- Detangle clean, damp hair with a wide-tooth comb.
- Section your hair and apply the mixture from roots to ends.
- Scrunch hair upward while applying.
- Cover with a shower cap.
- Leave on for 2-3 hours for deep conditioning benefits.
- Rinse with cool water, then wash with a gentle shampoo.
- Air dry while scrunching to enhance curls.
Recipe 3: Egg, Olive Oil, and Aloe Vera Hair Mask
This triple-action mask combines protein (egg), moisture (olive oil), and soothing benefits (aloe vera) for maximum curl enhancement.
Ingredients:
- 2 whole eggs
- 2 tablespoons olive oil (slightly warmed)
- 3 tablespoons pure aloe vera gel (fresh or store-bought)
Instructions:
- Warm olive oil for 10 seconds in the microwave. Test temperature on your wrist before using.
- Beat eggs in a bowl until frothy.
- Add aloe vera gel and olive oil to the eggs.
- Mix all ingredients until you have a smooth, consistent mixture.
- Detangle clean, damp hair thoroughly.
- Apply mixture section by section, focusing on mid-lengths and ends.
- Scrunch continuously while applying.
- Massage scalp gently for 2-3 minutes to improve circulation.
- Cover with a shower cap.
- Leave on for 45-60 minutes.
- Rinse thoroughly with cool water.
- Wash with a mild, sulfate-free shampoo.
- Air dry with periodic scrunching.
Important Tips for Egg Hair Masks
- Always use cool or lukewarm water to rinse, never hot water
- Use fresh eggs for best results
- Do a patch test first if you have sensitive skin or scalp
- Apply masks on clean hair for better absorption
- Add a few drops of essential oil (lavender, rosemary, or peppermint) to mask the egg smell
- Don’t leave eggs on for more than 3 hours as they can dry out hair
- Follow with a light conditioner if your hair feels dry after rinsing
- Be consistent: Results improve with regular use over 2-3 months
What to Expect
- After first use: Hair feels stronger and looks shinier
- After 2-3 weeks: Natural waves become more visible
- After 1-2 months: Curl pattern becomes more defined and consistent
- After 3+ months: Maximum curl enhancement based on your hair’s natural potential
4. Sea Salt Spray Method for Beachy Waves and Curls
Sea salt spray works by gently dehydrating the hair, which causes it to contract and form waves or curls. This method mimics the texture your hair gets after swimming in the ocean.
While sea salt spray alone won’t create permanent curls, using it regularly as part of your styling routine can train your hair to hold waves more easily over time. It’s especially effective for people with naturally wavy hair.
Who Should Try This Method
- People with straight to wavy hair (Type 1-2)
- Those who want loose, beachy waves rather than tight curls
- Anyone looking for a quick, heat-free styling method
- People with fine or limp hair who need texture and volume
Who Should Avoid This Method
- People with very dry, damaged, or color-treated hair (salt can be further drying)
- Those with coarse, thick hair (may cause excess dryness and frizz)
- Anyone with scalp conditions like eczema or psoriasis
Recommended Sea Salt Spray Products


DIY Sea Salt Spray Recipe
Making your own sea salt spray is easy and cost-effective.
Ingredients:
- 1 cup warm water
- 1-2 tablespoons sea salt (not table salt)
- 1 teaspoon coconut oil or argan oil
- 1 teaspoon aloe vera gel (optional, for moisture)
- 5-10 drops of essential oil (optional, for scent)
- Empty spray bottle
Instructions:
- Add sea salt to warm water and stir until completely dissolved
- Add oil, aloe vera gel, and essential oil
- Pour mixture into spray bottle
- Shake well before each use
- Store in a cool place; use within 2 weeks
Step-by-Step Application Process
Method 1: Post-Shower Application
- Wash your hair as usual and gently towel-dry.
- Wait until hair is damp, not soaking wet or completely dry.
- Detangle gently with a wide-tooth comb or your fingers.
- Shake the sea salt spray bottle vigorously for 10 seconds.
- Section your hair into 4-6 parts for even application.
- Hold the bottle 6-8 inches away from your head.
- Spray generously on each section, focusing on mid-lengths and ends. Lightly spray roots if you want volume.
- Scrunch hair upward toward your scalp with your hands. The more you scrunch, the more defined your waves will be.
- Twist small sections of hair around your fingers for extra curl definition.
- Let hair air dry naturally, or diffuse on low heat if you’re in a hurry.
- Don’t touch your hair while it’s drying to avoid frizz.
- Once dry, scrunch again to soften the waves and add volume.
Method 2: Refresh Spray (On Dry Hair)
- Lightly mist dry hair with water using a spray bottle.
- Apply sea salt spray to damp sections.
- Scrunch and twist to reactivate waves.
- Let air dry or use a diffuser briefly.
How Often to Use Sea Salt Spray
- Normal hair: 3-4 times per week
- Dry hair: 1-2 times per week maximum
- Oily hair: Daily if desired
Tips for Best Results
- Always shake the bottle before spraying
- Start with less product and add more if needed
- Focus spray on mid-lengths and ends, not roots
- Scrunch, don’t brush, for wave formation
- Use a deep conditioning treatment once a week to prevent dryness
- Apply leave-in conditioner before sea salt spray if you have dry hair
- Sleep with hair in a loose bun or braid to maintain waves overnight
- Combine with other methods (like the Curly Girl Method) for better long-term results
Common Problems and Solutions
| Problem | Solution |
| Hair feels too dry or crunchy | Use less spray; add more oil to your DIY mixture |
| No wave formation | Apply to damper hair; scrunch more aggressively |
| Waves fall flat quickly | Add a light-hold mousse before sea salt spray |
| Hair looks dull | Follow with a light hair oil on ends |
| Too much frizz | Apply anti-frizz serum before sea salt spray |
5. Protective Styling and Hair Training
Protective styling involves wearing your hair in low-manipulation styles that train it into a curl pattern over time. This method works by consistently holding hair in a curled position, teaching the hair bonds to form waves or curls naturally.
Popular protective styles include twists, bantu knots, flexi-rod sets, and pin curls. When done regularly over several months, these styles can create lasting curl memory in your hair.
Who Should Try This Method
- People with any hair type willing to commit to consistent styling
- Those who want to protect hair from damage while creating curls
- Anyone interested in trying different curl patterns
- People with damaged hair who need a break from heat and chemicals
Popular Protective Styling Techniques
Bantu Knots
- Creates tight, defined curls
- Best for medium to long hair
- Leave in overnight or for 6-8 hours
- Results in springy, uniform curls
Two-Strand Twists
- Creates elongated, loose curls
- Works on all hair lengths
- Can be worn for several days
- Results in defined twist-out pattern
Pin Curls
- Creates vintage-style waves or curls
- Best for short to medium hair
- Leave in for 4-8 hours
- Results in smooth, elegant curls
Flexi-Rod Set
- Creates bouncy, spiral curls
- Works on all hair types and lengths
- Leave in overnight
- Results in long-lasting, flexible curls
Basic Protective Styling Routine
- Start with clean, conditioned hair
- Apply a leave-in conditioner or curl cream
- Section hair into manageable parts
- Create your chosen protective style (twists, knots, pin curls, etc.)
- Allow to dry completely (air dry or use a hooded dryer)
- Sleep with a satin bonnet or scarf
- Carefully undo the style in the morning or after 6-8 hours
- Separate curls gently with fingers
- Set with light oil or anti-frizz serum
Long-Term Hair Training Schedule
- Week 1-4: Style hair 2-3 times per week
- Month 2-3: Continue consistent styling; curls start holding longer
- Month 4-6: Hair shows natural curl tendency even without styling
- Month 6+: Reduce styling frequency as hair maintains curl pattern naturally
Additional Tips to Maintain and Enhance Natural Curls
Once you start developing your natural curl pattern, proper maintenance is essential to keep your curls healthy, defined, and long-lasting.
1. Get the Right Haircut
A proper haircut doesn’t create curls, but it makes a huge difference in how your curls look and behave. The right cut removes excess weight, adds shape, and helps curls spring up naturally.
Best Haircuts for Curly Hair:
- Long layers: Removes weight while maintaining length
- Shag cut: Adds volume and movement throughout
- DevaCut: Cut on dry, curly hair for customized curl shaping
- Curly bob: Works well for tighter curl patterns
- Face-framing layers: Highlights curls around the face
What to Avoid:
- Blunt cuts without layers
- Thinning scissors or razoring (can cause frizz)
- Too many short layers (creates triangle shape)
- Cutting hair when wet (curls shrink when dry)
For more styling inspiration, check out textured vs layered hair differences.
2. Deep Conditioning Treatments
Curly hair tends to be drier than straight hair because natural oils have a harder time traveling down the curl pattern. Regular deep conditioning keeps curls moisturized, elastic, and defined.
How Often to Deep Condition:
- Normal curly hair: Once per week
- Dry or damaged hair: Twice per week
- Fine curly hair: Once every 10 days
Deep Conditioning Process:
- Wash hair with a gentle cleanser
- Apply deep conditioner generously from roots to ends
- Detangle with a wide-tooth comb
- Cover with a shower cap
- Apply heat (warm towel or hooded dryer) for 20-30 minutes
- Rinse with cool water
- Style as usual
3. Night Care Routine
How you sleep can make or break your curls. Proper night care prevents frizz, tangling, and curl deformation.
Protective Sleep Methods:
- Pineapple method: Gather curls loosely on top of head with a scrunchie
- Loose bun: Twist curls gently into a loose bun at the crown
- Satin/silk bonnet: Protects all curls while sleeping
- Satin/silk pillowcase: Reduces friction if you don’t like bonnets
- Braids or twists: For longer-lasting curl definition
4. Refresh Routine for Second-Day Curls
You don’t need to restyle your hair every day. A quick refresh routine brings curls back to life.
Simple Refresh Method:
- Lightly mist hair with water using a spray bottle
- Apply a small amount of leave-in conditioner or curl refresher
- Scrunch curls upward
- Smooth down any frizz with a tiny amount of oil or serum
- Let air dry or diffuse briefly
5. Avoid These Curl-Damaging Habits
- Touching hair while drying: Causes frizz and disrupts curl formation
- Using regular towels: Creates friction and frizz
- Brushing dry hair: Breaks up curl pattern
- Over-washing: Strips natural oils
- Using heat frequently: Damages curl pattern over time
- Skipping trims: Split ends travel up the hair shaft
- Using products with silicones and sulfates: Creates buildup and dryness
6. Use Sea Salt Spray for Extra Definition
Sea salt spray isn’t just for creating curls—it’s also excellent for maintaining and defining them between wash days.
Recommended Products:
Application for Curl Maintenance:
- Lightly mist hair with water to dampen it.
- Shake sea salt spray bottle thoroughly.
- Spray on mid-lengths and ends, avoiding the scalp to prevent dryness.
- Scrunch hair upward to reactivate curl pattern.
- Twist sections around your finger for more defined spirals.
- Let air dry completely without touching.
- Apply a small amount of hair oil to ends if hair feels dry.
7. Maintain Overall Hair Health
Healthy hair holds curls better and looks more vibrant. Focus on overall hair health for the best curl results.
Essential Hair Health Practices:
- Stay hydrated: Drink at least 8 glasses of water daily
- Eat protein-rich foods: Hair is made of protein (keratin)
- Take hair vitamins: Biotin, vitamin E, and omega-3s support curl formation
- Protect from sun damage: Wear a hat or use UV-protectant sprays
- Trim regularly: Every 8-12 weeks to prevent split ends
- Avoid tight hairstyles: Tension can damage curl pattern
- Limit chemical treatments: Give hair breaks between coloring or chemical processes
Comparing Natural Curling Methods: Which One Is Right for You?
Each method has different requirements, timelines, and results. This comparison helps you choose the best approach for your lifestyle and hair goals.
| Method | Best For | Time to Results | Cost | Commitment Level | Curl Type Created |
| Curly Girl Method | Type 2-4 hair | 3-6 months | Medium | Very High | Enhances natural pattern |
| Old-School Method | Type 2-3 hair | 2-4 months | Low | Medium | Defined to loose curls |
| Egg Hair Masks | Type 2-3 hair | 2-3 months | Very Low | Medium | Gentle waves to curls |
| Sea Salt Spray | Type 1-2 hair | 1-2 months | Low | Low | Loose, beachy waves |
| Protective Styling | All hair types | 3-6 months | Low to Medium | High | Varies by technique |
Understanding Why Results Vary by Hair Type
Your starting hair texture determines how much curl potential you can unlock naturally. Here’s what to realistically expect based on your hair type.
Type 1: Straight Hair
- Natural curl potential: Very limited
- Expected results: Loose waves at best with consistent effort
- Best methods: Old-school techniques, sea salt spray, protective styling
- Reality check: May need chemical treatment for true permanent curls
Type 2: Wavy Hair
- Natural curl potential: High
- Expected results: Defined waves to loose curls
- Best methods: All natural methods work well
- Timeline: 2-4 months for noticeable transformation
Type 3: Curly Hair
- Natural curl potential: Already curly, can be enhanced
- Expected results: More defined, healthier, bouncier curls
- Best methods: Curly Girl Method, egg masks, protective styling
- Timeline: 1-3 months to see improvement in curl quality
Type 4: Coily/Kinky Hair
- Natural curl potential: Very high, naturally coily
- Expected results: More defined coils, less shrinkage, better moisture retention
- Best methods: Curly Girl Method, protective styling, regular deep conditioning
- Timeline: 1-2 months to see enhanced definition
When Natural Methods Aren’t Enough: Understanding Your Options
Natural methods work wonderfully for enhancing existing texture, but if you have completely straight hair with no curl potential, you might need alternative approaches.
Chemical Perms: Permanent Curl Restructuring
If natural methods haven’t given you the curls you want after 6 months of consistent effort, a chemical perm might be your best option.
Perm Benefits:
- Truly permanent results (lasts until hair grows out)
- Works on completely straight hair
- Creates uniform curl pattern
- Requires less daily styling
Perm Drawbacks:
- Chemical damage to hair structure
- Requires professional application
- Can be expensive ($60-$300)
- Needs special maintenance routine
- Can’t be reversed (must grow out)
Combining Methods for Best Results
Many people find success by combining multiple natural methods. For example:
- Curly Girl Method + Weekly egg masks
- Old-school techniques + Sea salt spray for maintenance
- Protective styling + Deep conditioning treatments
- Curly Girl Method + Proper layered haircut
Common Mistakes That Prevent Natural Curl Formation
Even with the right methods, certain mistakes can sabotage your curl journey.
1. Expecting Results Too Quickly
Natural curl formation takes time. Hair grows slowly, and retraining its pattern is a gradual process. Give any method at least 8-12 weeks before judging results.
2. Inconsistent Routine
Curling your hair once a week, then forgetting for two weeks won’t create lasting results. Consistency is essential for training hair into a new pattern.
3. Using the Wrong Products
Products with silicones, sulfates, and drying alcohols create buildup and prevent curl formation. Always check ingredient lists.
4. Heat Styling During Transition
Using flat irons or blow dryers even occasionally can undo weeks of progress. Commit to being fully heat-free during your curl training period.
5. Not Adjusting for Your Hair Type
What works for wavy hair might not work for straight hair. Adjust techniques and expectations based on your natural texture.
6. Over-Washing Hair
Washing daily strips natural oils that help curl formation. Limit washing to 2-3 times per week maximum.
7. Skipping Deep Conditioning
Dry hair doesn’t curl well. Regular deep conditioning keeps hair moisturized and elastic enough to hold curl patterns.
Frequently Asked Questions About Natural Curl Formation
Can I make completely straight hair curly naturally?
If your hair has absolutely no wave or curl pattern, natural methods will likely only create temporary waves. Permanent curls on truly straight hair usually require chemical treatments like perms.
How long do natural curls last?
Individual styling sessions last 2-3 days, but with consistent practice over 3-6 months, your hair develops “curl memory” that makes styling easier and curls last longer naturally.
Will these methods damage my hair?
Natural methods are much gentler than heat or chemical treatments. When done correctly with proper products and techniques, they should actually improve hair health.
Can I use heat styling occasionally?
Using heat styling even occasionally during your transition period can disrupt curl formation. For best results, avoid all heat for at least 3-6 months.
Do I need to buy expensive products?
No. Many effective curl-friendly products are affordable, and some methods (like egg masks and DIY sea salt spray) use kitchen ingredients. Focus on ingredient quality, not price.
Can I color or dye my hair during this process?
Chemical treatments can interfere with natural curl formation and damage hair structure. It’s best to wait until your curl pattern is established before coloring.
What if only parts of my hair curl?
This is completely normal. Most people have multiple curl patterns on different parts of their head. Continue your routine—consistency helps even out the pattern over time.
Will my curls be permanent?
“Permanent” with natural methods means your hair maintains curl tendency with minimal maintenance. If you stop the routine entirely, curls may gradually relax, but won’t disappear overnight like styled curls would.
Can men use these methods?
Absolutely. These methods work the same regardless of gender. Men with any hair length can benefit from natural curling techniques.
Should I see a hair professional?
Consulting a hairstylist who specializes in curly hair is always helpful. They can assess your hair type, recommend specific products, and give you a curl-friendly haircut that enhances your natural pattern.
Creating a Sustainable Curl Care Routine
Success with natural curl formation comes down to creating a routine you can stick with long-term. Here’s a sample weekly schedule that balances effectiveness with realistic time commitment.
Sample Weekly Curly Hair Routine
Sunday (Wash Day)
- Co-wash or use gentle shampoo
- Deep condition for 30 minutes
- Apply styling products (gel, mousse, or cream)
- Air dry or diffuse
- Scrunch out the crunch when dry
Monday-Tuesday
- Sleep with hair in protective style (pineapple or loose bun)
- Morning refresh with water and light product
- Scrunch and go
Wednesday (Mid-Week Refresh)
- Wet hair lightly with spray bottle
- Apply sea salt spray or curl refresher
- Scrunch and redefine curls
- Air dry
Thursday (Hair Mask Day)
- Apply egg hair mask or other natural treatment
- Leave on for 30-60 minutes
- Wash and style as normal
Friday-Saturday
- Maintain with protective nighttime styling
- Refresh with water and product as needed
- Prepare for Sunday wash day
Final Thoughts: Your Natural Curl Journey
Making your hair naturally curly permanently is possible, but it requires understanding your hair type, choosing the right methods, and committing to consistent care over several months.
The five methods covered in this guide—the Curly Girl Method, old-school techniques, egg hair masks, sea salt spray, and protective styling—each offer different approaches to bringing out your hair’s curl potential. The key is finding what works for your specific hair type and lifestyle.
Remember these essential points:
- Natural methods work best on hair with existing wave or curl potential (Type 2-4)
- Results take 3-6 months of consistent practice
- Completely straight hair may need chemical treatments for permanent curls
- Product choice matters—avoid sulfates, silicones, and drying alcohols
- Heat styling must be eliminated during the transition period
- Patience and consistency are more important than expensive products
- A proper curl-friendly haircut enhances your results
If natural methods don’t give you the results you want after 6 months, don’t be discouraged. You might simply need additional help from a professional stylist or consider a chemical perm for your desired curl pattern.
For additional styling ideas and techniques, explore how to get beach waves or check out beach waves hair products that complement your natural curl routine.
Your hair’s natural texture is unique to you. Whether you achieve tight spirals, loose waves, or something in between, embracing and enhancing what your hair naturally wants to do will always give you the healthiest, most beautiful results.
| Photo | Popular Hair Product | Price |
|---|---|---|
|
|
Kkioor 24 Inch Chocolate Brown Human Hair Wig 200 Density Body Wave Lace Front Wigs Human Hair Pre Plucked 13X4 HD Frontal Wig 4# Colored Brown Wig For Women Glueless Wigs | Check Price On Amazon |
|
|
KingSup 613 Lace Front Wig Human Hair Pre Plucked 250 Density 26 Inch 5x5 HD Lace Closure Straight Blonde Wig Human Hair, 100% Real Human Hair without Synthetic Blend Tangle Free Triple Lifespan 3X | Check Price On Amazon |
|
|
WIGCHIC 16" Kinky Curly Half Wig Human Hair Burgundy & Dark Roots | Flip-Over Drawstring | Seamless 4C Hairline | True Length | 3-in-1 Styling | Beginner Friendly (T1B/99J) | Check Price On Amazon |
|
|
Hair Removal Cream for Men & Women: Painless Depilatory for Sensitive Skin & Intimate Areas, Moisturizing with Aloe Vera & Vitamin E, Safe for Face, Underarms, Bikini, Arms (3.7 Fl Oz (Pack of 2)) | Check Price On Amazon |
|
|
ZOOLY PROFESSIONAL Ginger Shampoo and Conditioner Sets 20.3 Fl Oz- Anti Hair Loss and Nourishes Hair Roots, Salon Level Scalp Care for Men and Women | Check Price On Amazon |
|
|
LUSN Baby Hair Clippers with Vacuum, Quiet Hair Trimmers for Kids, IPX7 Waterproof Rechargeable Cordless Haircut Kit for Baby Children Infant | Check Price On Amazon |
|
|
LURA Dual Voltage Travel Hair Dryer with Diffuser,Travel Blow Dryer Mini with EU Plug and UK Plug,Lightweight Portable Hairdryers with Folding Handle,1200W Compact Small Blowdryers for Women | Check Price On Amazon |