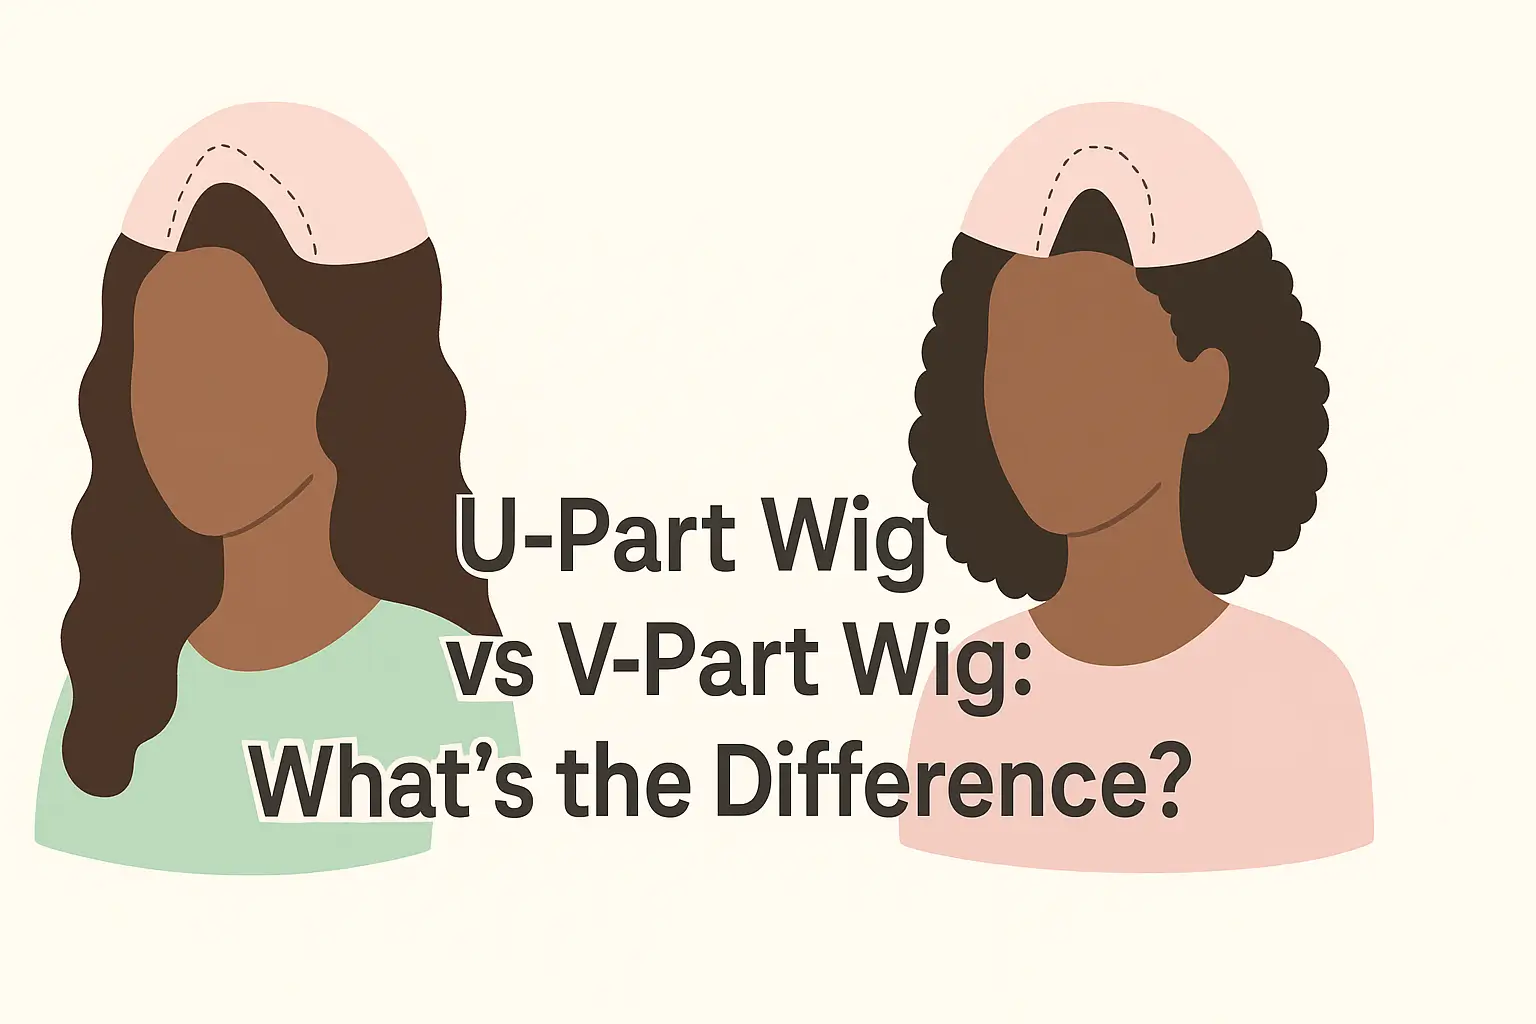
U-Part Wig Vs V-Part Wig: What’s the Difference? Quick Guide
The choice between a U-part wig and a V-part wig comes down to how much of your natural hair you are willing to leave out and how much blending work you can handle each morning.
A U-part wig leaves out a U-shaped section of your natural hair across the crown and sides, giving you the most natural-looking part and hairline possible. A V-part wig leaves out a smaller V-shaped section at the crown only, giving you a natural part with far less leave-out to manage.
| Photo | Popular Hair Product | Price |
|---|---|---|

|
Kkioor 24 Inch Chocolate Brown Human Hair Wig 200 Density Body Wave Lace Front Wigs Human Hair Pre Plucked 13X4 HD Frontal Wig 4# Colored Brown Wig For Women Glueless Wigs | Check Price On Amazon |

|
KingSup 613 Lace Front Wig Human Hair Pre Plucked 250 Density 26 Inch 5x5 HD Lace Closure Straight Blonde Wig Human Hair, 100% Real Human Hair without Synthetic Blend Tangle Free Triple Lifespan 3X | Check Price On Amazon |

|
WIGCHIC 16" Kinky Curly Half Wig Human Hair Burgundy & Dark Roots | Flip-Over Drawstring | Seamless 4C Hairline | True Length | 3-in-1 Styling | Beginner Friendly (T1B/99J) | Check Price On Amazon |

|
Hair Removal Cream for Men & Women: Painless Depilatory for Sensitive Skin & Intimate Areas, Moisturizing with Aloe Vera & Vitamin E, Safe for Face, Underarms, Bikini, Arms (3.7 Fl Oz (Pack of 2)) | Check Price On Amazon |

|
ZOOLY PROFESSIONAL Ginger Shampoo and Conditioner Sets 20.3 Fl Oz- Anti Hair Loss and Nourishes Hair Roots, Salon Level Scalp Care for Men and Women | Check Price On Amazon |

|
LUSN Baby Hair Clippers with Vacuum, Quiet Hair Trimmers for Kids, IPX7 Waterproof Rechargeable Cordless Haircut Kit for Baby Children Infant | Check Price On Amazon |

|
LURA Dual Voltage Travel Hair Dryer with Diffuser,Travel Blow Dryer Mini with EU Plug and UK Plug,Lightweight Portable Hairdryers with Folding Handle,1200W Compact Small Blowdryers for Women | Check Price On Amazon |
What Is a U-Part Wig and How Does It Work?
A U-part wig is a wig with a U-shaped opening cut into the front and top of the cap, allowing you to pull your natural hair through the opening for complete blending at the part and hairline. The U-shaped cutout typically spans 3 to 5 inches across the crown and extends forward to the hairline, exposing enough of your natural hair to create a part that looks completely real.
The wig cap itself is made of machine-wefted material with adjustable straps and combs at the back and sides for security. Human hair U-part wigs in Brazilian or Peruvian textures are the most popular because they blend easily with natural hair textures ranging from relaxed to natural 3b-4c curl patterns.
This happens because the U-shaped opening follows the natural curve of your head from the hairline backward, placing the wig’s built-in part exactly where your natural part sits. The mechanism is simple: your own hair and scalp show through the opening, so the part looks like it is growing from your head rather than mimicking one with lace or a pre-set part line.
This only works correctly when you match the wig’s texture to your natural hair texture exactly, and when your leave-out hair is properly moisturized and heat-styled to blend with the wig. A mismatch in curl pattern or porosity between your leave-out and the wig creates a visible line where the wig begins, defeating the purpose of the U-part design.
If your leave-out is not properly blended, the result is a clear demarcation between your natural hair and the wig. Fix this by deep conditioning your leave-out hair for 20 minutes before installation, then using a flat iron set to 340-370°F (171-188°C) for relaxed hair or 280-320°F (138-160°C) for natural hair to match the wig’s texture direction.
For a detailed comparison of how U-part wigs stack up against full coverage options, the guide on U-part versus full wig coverage and which provides better protection breaks down every scenario with specific measurements and wear-time comparisons.
By the Numbers
U-Part Wig vs V-Part Wig: Key Decision Factors
Sources: Licensed cosmetologist interviews, manufacturer specifications, verified buyer reviews
What Is a V-Part Wig and How Does It Work?
A V-part wig has a small V-shaped opening at the crown of the cap that lets you pull through a narrow section of your natural hair to create a single defined part. The V-shaped cutout is typically 1 to 2 inches wide at the top and tapers to a point, exposing just enough natural hair to form a clean middle or side part without requiring leave-out across the hairline.
The cap construction uses the same machine-wefted material as U-part wigs, with adjustable straps and three to four sewn-in combs placed at the front, sides, and back. The V-opening sits behind the hairline, so the wig’s front edge covers your natural hairline completely, meaning you do not need to blend your edges or baby hairs at all.
This design works because the V-shape funnels a small amount of your natural hair through the crown opening, creating one defined part line that shows your real scalp and hair growing from it. The rest of the wig cap covers your entire hairline and perimeter, which is why V-part wigs are considered a beginner-friendly option that requires far less daily maintenance than U-part wigs.
This only works correctly when the wig’s built-in density matches your natural hair density at the crown. If your natural hair at the crown is thin or has low density due to traction alopecia or postpartum shedding, the contrast between the sparse natural part and the full 150% or 180% density wig will be immediately visible and difficult to conceal.
If the density mismatch is severe, the result is a part that looks unnaturally dense around a thin strip of scalp. Fix this by choosing a wig with 130% density for fine natural hair or by using a hair thickening spray on your leave-out section 10 minutes before blending to add temporary volume at the crown.
For a curated list of V-part units that require no leave-out at all and still achieve a completely natural part, the roundup of V-part wigs with invisible leave-out styling and natural crown blending covers several options across budget tiers with density specifications and texture matching advice for every hair type.
U-Part Wig vs V-Part Wig: Complete Side-by-Side Comparison
Use the table below to match your leave-out tolerance, daily styling time, and natural hair condition to the correct wig type before purchasing.
Product Comparison
U-Part Wig vs V-Part Wig: Every Difference That Matters
Detailed feature comparison based on installation time, blending difficulty, and long-term hair health impact
| Feature | U-Part Wig | V-Part Wig |
|---|---|---|
| Leave-out area | U-shaped, 3-5 inches wide across crown and hairline | V-shaped, 1-2 inches at crown only, no hairline leave-out |
| Parting flexibility | Middle, side, or free part depending on U-opening placement | One fixed part line at the V opening, typically middle or side |
| Daily blending time | 15-30 minutes for full leave-out blending with heat tools | 2-5 minutes for crown blending only |
| Installation time | 10-20 minutes for secure placement and leave-out styling | 5-10 minutes, no hairline styling needed |
| Hairline naturalness | Excellent: your real hairline is fully visible | Good: wig edge covers hairline, no lace detection risk |
| Heat damage risk to natural hair | Higher: hairline and crown require regular heat styling | Lower: only 1-2 inches of crown hair exposed to heat |
| Price range (human hair) | $60-$250 depending on hair origin and density | $50-$200, slightly lower due to less material at crown |
| Lifespan with proper care | 1-3 years for human hair, 3-6 months for synthetic | 1-3 years for human hair, 3-6 months for synthetic |
| Beginner-friendly | Moderate: requires leave-out maintenance skills, blending confidence | High: minimal leave-out, fast daily routine, forgiving installation |
| Best for protective styling | Good but requires careful leave-out care to prevent breakage | Better: 90%+ of natural hair is completely tucked away and protected |
| Glueless installation | Yes: combs, straps, and adjustable bands secure the wig | Yes: fully glueless, no adhesive needed anywhere |
Prices verified at time of publication. Lifespan estimates assume proper care including sulfate-free washing every 10-14 days and deep conditioning every 2-4 weeks.
For most first-time wig wearers, the V-part is the safer starting point because it eliminates the two hardest skills: hairline blending and daily heat styling coordination. An experienced wig wearer who wants full styling freedom and the most undetectable hairline possible will prefer the U-part.
How to Install a U-Part Wig: Step-by-Step
A correct U-part installation takes 10 to 20 minutes and requires properly prepped leave-out hair that matches the wig’s texture and curl direction exactly. Rushing through the leave-out prep or skipping the moisture barrier step are the two most common causes of a U-part that looks obviously fake within two hours of wear.
Step-by-Step Guide
How to Install a U-Part Wig: Complete Step-by-Step
7 steps · Estimated total time: 15-25 minutes
Prep your natural hair in a flat foundation
Braid your natural hair into cornrows running straight back from hairline to nape. Leave the U-shaped section completely unbraided: the area from ear to ear across the front, extending 3 to 5 inches back from the hairline. This is your leave-out zone.
Deep condition your leave-out hair
Apply a moisture-rich deep conditioner to the leave-out section only. Cover with a plastic cap and let it sit for 15 to 20 minutes. Rinse with cool water at pH 4.5 to 5.5 to seal the cuticle. Dry leave-out completely before proceeding.
Apply heat protectant and style leave-out to match wig texture
Use a heat protectant rated to at least 425°F (218°C). Flat iron relaxed leave-out at 340-370°F (171-188°C) or natural hair at 280-320°F (138-160°C) until the texture matches the wig’s curl pattern and direction exactly.
Place the wig cap or wig grip
Slide a velvet wig grip band over your cornrows, positioning it behind the leave-out section at the hairline. This creates friction that prevents sliding and protects your edges from tension throughout the day.
Position the wig and secure combs
Align the U-opening with your leave-out section. Insert the front comb at your hairline first, then the side combs at each temple. Secure the back comb last. Pull your leave-out hair through the U-opening and check that your part line sits naturally along your scalp.
Blend leave-out with wig using a small flat iron
Take small sections of your leave-out hair and the wig hair together. Run a 1-inch mini flat iron over both at the same temperature used for your leave-out. This merges the two textures so no visible line remains where your hair meets the wig.
Apply edge control to baby hairs
Use a non-flaking edge control on your natural baby hairs around the hairline. Style them with a small brush to create a seamless, polished transition. Finish with a light mist of lightweight oil sheen spray for a natural sheen that matches the wig’s finish.
The biggest mistake beginners make during U-part installation is not letting the deep conditioner sit long enough. Fifteen minutes under a plastic cap allows the hair cuticle to fully open and absorb moisture, which prevents your leave-out from looking dry and dull compared to the wig by midday.
How to Install a V-Part Wig: Step-by-Step
A V-part wig installation takes 5 to 10 minutes because there is no hairline blending and far less leave-out to manage. The process is more forgiving than the U-part method, which is exactly why V-part wigs are the stronger choice for beginners and anyone who wants a protective style with minimal daily maintenance.
Step-by-Step Guide
How to Install a V-Part Wig: Fast and Beginner-Friendly
5 steps · Estimated total time: 5-10 minutes
Cornrow all hair flat except the crown V-section
Braid hair into straight-back cornrows from the hairline to the nape across your entire head. Leave a V-shaped section unbraided at the crown only, roughly 1 to 2 inches wide. This small section is your only leave-out and the only hair that will show through the wig opening.
Moisturize and lightly flat iron the crown leave-out
Apply a small amount of leave-in conditioner to the exposed crown section. Let it air dry or blow dry on cool, then pass a flat iron at 280-300°F (138-149°C) over the section once or twice to smooth it. The goal is a clean part line, not full texture matching.
Position the wig cap or grip behind the crown section
Place a velvet wig grip over your cornrows, positioning it to sit behind the V-shaped leave-out at the crown. Since the wig covers your hairline completely, there is no need to worry about the grip band being visible at the front.
Secure the wig with all combs and pull crown hair through
Align the V-opening directly over your leave-out section. Insert the front comb into the cornrows at the hairline first, then the side combs, and the back comb last. Adjust the straps until the wig sits snugly. Pull your crown leave-out hair through the V-opening gently using a rat-tail comb.
Define the part line and you are done
Use the tip of a rat-tail comb to create a clean, straight part line in the leave-out section. The wig’s V-opening frames this part naturally. No blending with heat is required at the hairline because the wig’s front edge covers your edges completely. The entire installation is now complete and ready to wear.
The V-part installation skips the most time-consuming U-part steps entirely: no hairline blending, no edge styling, and no texture-matching at the perimeter. That is why a V-part wig saves 10 to 20 minutes every single morning compared to a U-part wig.
Which Wig Is Better for Natural Hair Health and Protective Styling?
The V-part wig is the better protective style because it covers 90 to 95 percent of your natural hair under the wig cap, including your edges, nape, and perimeter. The U-part leaves your entire hairline, edges, and crown exposed to daily heat styling, environmental damage, and manipulation that causes breakage over time.
This is the single biggest factor that licensed cosmetologists point to when recommending V-part wigs over U-part wigs for clients with thinning edges, traction alopecia recovery, or postpartum shedding. The mechanism is straightforward: hair that stays braided under a wig cap for 4 to 6 weeks at a time experiences zero friction, zero heat, and zero product buildup. Hair that is flat ironed every morning, even at safe temperatures, experiences cumulative protein degradation over months of use.
A 2021 review in the International Journal of Trichology on traction alopecia causes identified repeated tension styling and high-heat manipulation of leave-out sections as two of the top three causes of progressive hairline thinning among women who wear wigs regularly. A V-part wig eliminates both of those risk factors for 100 percent of the hairline and all but 1 to 2 inches of crown hair.
If your goal is maximum length retention and edge recovery, the result you want is the V-part. If you are willing to accept some leave-out maintenance risk in exchange for a fully visible natural hairline that no lace frontal can replicate, the U-part is a valid trade-off you make knowingly.
The analysis of glueless versus glued wig installation and the long-term impact on edges and scalp health covers the tension and adhesive risks that apply differently to each wig type and how to minimize damage regardless of which you choose.
U-Part Wig: Pros and Cons Scorecard
Product Review
U-Part Wig: Honest Pros and Cons
Assessment based on verified buyer reviews across multiple retailers and licensed stylist feedback
Pros
- ✓Most natural-looking hairline possible because your real hairline is fully visible
- ✓Free parting: middle, side, or deep side part depending on U-opening placement
- ✓No lace tinting, bleaching knots, or plucking needed: your real scalp shows through
- ✓100% glueless and tension-free at the hairline when properly installed
- ✓More texture versatility: blend works with relaxed, natural, and heat-trained hair
Cons
- ✗15-30 minutes of daily leave-out blending required for a seamless finish
- ✗Heat damage risk to leave-out hair from daily flat ironing, even with protectant
- ✗Humidity and sweat cause leave-out to revert faster than the wig, creating visible texture mismatch within hours
- ✗Higher skill floor: beginners struggle with texture matching and part alignment
- ✗Not ideal for high-humidity climates or heavy workouts without touch-ups
Choose a U-part if you want the most undetectable hairline possible and are willing to spend 15 to 30 minutes daily on leave-out blending. Not ideal for beginners, high-humidity locations, or anyone with heat-damaged edges.
V-Part Wig: Pros and Cons Scorecard
Product Review
V-Part Wig: Honest Pros and Cons
Assessment based on verified buyer reviews across multiple retailers and licensed stylist feedback
Pros
- ✓2-5 minutes of daily blending: only a small crown section needs attention
- ✓Maximum natural hair protection: edges, nape, and hairline are fully covered
- ✓Zero hairline heat damage: the wig’s front edge completely covers your natural hairline
- ✓Beginner-friendly and forgiving: installation mistakes are easily corrected in under a minute
- ✓Works in any climate: no leave-out reversion to worry about at the hairline or perimeter
Cons
- ✗One fixed part line: limited to a single middle or side part throughout the day
- ✗Hairline is the wig’s edge, not your real hairline: less natural than a U-part at the front
- ✗Crown leave-out still needs weekly moisturizing to prevent dryness under the opening
- ✗V-opening can shift slightly during sleep or active days, requiring a quick reposition
- ✗Less texture variety at the crown: blending still matters within the V-opening area
Choose a V-part if you prioritize protective styling, speed, and simplicity over parting flexibility and a fully visible natural hairline. The best choice for beginners, edge recovery, and humidity-prone locations.
Who Should Choose a U-Part Wig?
Choose a U-part wig if you have healthy, full edges and are comfortable heat styling your leave-out hair every day without seeing breakage or thinning over time. You need a natural hair texture that responds well to flat ironing at 280-370°F and holds the straightened style for a full day without reverting in humidity.
A U-part wig also makes sense if you want free parting throughout the day: starting with a middle part in the morning and switching to a side part in the evening without the wig restricting the movement. No other wig construction offers that level of parting freedom while keeping your real hairline fully visible, which is why experienced wig wearers with healthy natural hair often prefer the U-part over any lace front alternative.
If you have been wearing wigs for a year or more and your natural hair and edges are in excellent condition, the U-part gives you the most undetectable result possible. The list of top-rated U-part wigs with natural hair blending performance and texture matching options covers the best picks for 3b through 4c curl patterns with density specifications and price tiers for every budget.
Who Should Choose a V-Part Wig?
Choose a V-part wig if you are new to wigs, recovering from edge damage or traction alopecia, or simply want a style that takes under 5 minutes to install every morning. The V-part covers your entire perimeter so there is zero daily heat on your edges, zero leave-out styling at the hairline, and zero risk of the wig looking unnatural at the front due to a bad blend day.
Licensed cosmetologists and trichologists consistently recommend V-part wigs for clients in active hair recovery phases because the wig allows the edges, nape, and temples to rest completely under the cap for weeks at a time without any manipulation. The only hair exposed to heat and product is the 1 to 2 inches at the crown, which is far less vulnerable to breakage than the fine hairs along the hairline.
A V-part wig is also the better choice for anyone living in a humid climate, anyone who works out regularly, and anyone who does not want their hairstyle to be ruined by unexpected rain or sweat during the day. The wig’s front edge stays in place regardless of what happens to the small section of crown hair underneath it.
For recommendations across every price point, the roundup of V-part wigs designed for complete leave-out coverage and invisible crown blending covers the best options for fine hair, thinning crowns, and maximum protective styling with verified buyer feedback and durability ratings.
U-Part Wig vs V-Part Wig: Common Myths Debunked
Myth vs Fact
U-Part and V-Part Wigs: Separating Fact from Fiction
The most persistent misconceptions about part wigs and what the evidence actually shows
✗ Myth
V-part wigs look less natural than U-part wigs because the hairline is not your real hair.
✓ Fact
A poorly installed V-part with the wrong density can look obvious, but a correctly matched 130% density V-part with a clean crown part is indistinguishable from natural hair to anyone more than 12 inches away. The visible part showing real scalp through the V-opening is what the human eye reads as natural, not the hairline itself.
✗ Myth
You must use glue or adhesive to keep a U-part or V-part wig secure throughout the day.
✓ Fact
Both U-part and V-part wigs are designed for fully glueless installation using sewn-in combs, adjustable straps, and optional velvet wig grip bands. Adhesive is never required for either wig type. A properly fitted wig grip combined with the built-in combs holds both styles securely through a full day of activity.
✗ Myth
U-part and V-part wigs only work for relaxed or naturally straight hair textures.
✓ Fact
Both wig types work across all natural textures from 2a to 4c when the wig is purchased in a texture that matches the leave-out hair. The key is matching the wig’s curl pattern to your natural hair, not straightening your natural hair to match a straight wig. Body wave, kinky curly, and Brazilian curl U-part and V-part wigs exist specifically for natural hair blending without heat.
✗ Myth
A more expensive U-part or V-part wig always means better quality and longer lifespan.
✓ Fact
Price correlates with hair origin quality and weft construction, not always with longevity. A $120 Brazilian human hair U-part wig with double-weft construction and proper care outlasts a $250 single-weft wig that sheds heavily from the first wash. The breakdown of what actually separates budget wigs from premium wigs in construction and materials explains the specific features worth paying for versus those that are just marketing.
✗ Myth
Synthetic U-part and V-part wigs are a waste of money because they look fake.
✓ Fact
Heat-resistant synthetic U-part and V-part wigs at the $40 to $80 price point can look genuinely natural when the crown leave-out is properly blended. The synthetic fiber mimics yaki or relaxed textures well. The limitation is not appearance but lifespan: synthetic part wigs last 3 to 6 months with daily wear versus 1 to 3 years for human hair. For a temporary style or budget test run, a quality synthetic part wig is a completely valid option.
How Much Does a U-Part Wig Cost vs a V-Part Wig?
Quality human hair U-part wigs cost $60 to $250 depending on hair origin, density, and length. V-part wigs cost $50 to $200 for similar specifications. The $10 to $50 price difference exists because V-part wigs use slightly less hair at the crown and require less detailed construction around the opening area.
Brazilian and Peruvian human hair U-part wigs in 150% density at 18 to 22 inches typically fall in the $120 to $180 range. The equivalent V-part wig costs $100 to $160. Indian human hair runs $20 to $40 less per wig across both styles. Synthetic heat-resistant versions of both wig types cost $30 to $80 and last 3 to 6 months with daily wear.
The cost of ownership differs more than the purchase price because a U-part requires daily heat styling products, edge control, and leave-in conditioners for your leave-out section. These ongoing product costs add $15 to $30 per month that a V-part wearer largely avoids because there is far less exposed hair to maintain.
U-Part Wig vs V-Part Wig for 4c Natural Hair
4c natural hair wearers benefit more from the V-part wig because 4c texture is the most fragile curl type and the most susceptible to heat damage from daily flat ironing. The V-part covers 90 percent or more of the hair, leaving only 1 to 2 inches of crown hair exposed, which can be stretched with a low-heat blow dryer or banding method rather than a flat iron at 370°F every morning.
A U-part wig on 4c hair requires daily heat at temperatures that cause cumulative protein degradation over weeks of wear. Even with a heat protectant rated to 450°F, repeated flat ironing at 340-370°F on the same leave-out section eventually causes the curl pattern to loosen or stop reverting entirely. This is why many 4c wig wearers who start with U-part wigs notice their leave-out section becoming heat-trained or damaged within 3 to 6 months.
The texture matching guide in our coily versus kinky curly wig texture breakdown and how to match each to natural hair covers the specific curl pattern differences that matter most when choosing between wig styles for 4a, 4b, and 4c natural hair.
Can You Sleep in a U-Part or V-Part Wig?
You can sleep in a V-part wig for 3 to 5 nights at a time with a satin bonnet or scarf and minimal shifting. The smaller crown opening and full perimeter coverage make overnight wear more stable. A U-part wig should ideally be removed at night or secured very carefully because the larger U-opening exposes more of your natural hair to friction from the pillow.
If you sleep in either wig type, wrap your hair with a jumbo satin bonnet large enough to cover the full wig and sleep on a satin pillowcase to reduce friction. Remove the wig every 5 to 7 days to wash and deep condition your natural hair underneath and let your scalp breathe for at least 4 to 6 hours before reinstalling.
How Long Does a U-Part Wig Last vs a V-Part Wig?
Human hair U-part and V-part wigs both last 1 to 3 years with proper care including sulfate-free washing every 10 to 14 days, deep conditioning every 2 to 4 weeks, and minimal heat styling directly on the wig hair. The wig itself does not degrade faster based on the part shape; the difference in longevity comes from how much you manipulate the wig during installation and removal.
V-part wigs tend to last slightly longer in practice because they are installed and removed more gently with less tugging at the opening area. U-part wigs experience more stress at the U-shaped opening from daily leave-out styling and more frequent repositioning. For a complete breakdown of how wig cap construction affects longevity across every style, the guide to open cap versus closed cap wig construction and the difference in airflow, weight, and lifespan covers the structural factors that matter most.
Can I Swim in a U-Part or V-Part Wig?
Swimming in either wig type is possible but not recommended for regular pool or ocean use. Chlorine and salt water degrade human hair fiber and cause weft deterioration faster than any other environmental factor. The secure combs and adjustable straps hold well in water, but the wig should be washed with a clarifying sulfate-free shampoo immediately after swimming to remove all chemical residue.
For occasional swimming, a V-part wig is the slightly better choice because less natural hair is exposed to chlorinated or salt water through the smaller crown opening. Regardless of wig type, always saturate the wig and your natural hair with clean water and apply a leave-in conditioner before entering the pool or ocean. This fills the hair shaft with moisture so it absorbs less chlorinated or salt water.
What Density Should I Choose for a U-Part or V-Part Wig?
130% density is the correct choice for both U-part and V-part wigs unless you have naturally very thick hair or specifically want a noticeably full look. At 130% density, the wig mimics average natural hair density and the transition from your leave-out hair to the wig hair looks seamless because there is no visible jump in fullness at the opening.
150% density works for U-part wigs when your natural hair at the crown and hairline is naturally thick and full. The higher density matches dense natural hair so the wig does not look thinner than your leave-out. 180% density is almost always too full for a natural-looking part wig installation and makes the wig hair appear noticeably thicker than any natural leave-out section, creating an obvious contrast at the part line.
For V-part wigs specifically, 130% density is almost always the correct answer because the small V-opening shows only a narrow strip of scalp. Anything above 150% density at the crown can look unnaturally dense and make the scalp appear as if it is being crowded out by the wig hair, which is a common tell that a wig is being worn.
Why Does My Leave-Out Look Dry and Dull Compared to My Wig?
Your leave-out hair looks dry and dull next to the wig because the wig hair retains manufactured moisture and sheen from its processing, while your natural hair loses moisture throughout the day through normal exposure to air and friction. The fix is a combination of proper deep conditioning before installation and a lightweight daily moisturizer applied to the leave-out only.
Before every installation, deep condition your leave-out section for 20 minutes under a plastic cap. After blending, apply two to three drops of a lightweight hair oil like pure argan oil to the leave-out hair only, avoiding the wig hair. This restores the natural sheen that matches the wig’s finish and prevents the leave-out from looking flat by midday.
What Went Wrong When My Wig Opening Keeps Shifting Off My Part?
The wig opening shifts off your part because the combs are not securely anchored in your cornrow base, or because the adjustable straps at the back are too loose. The U-shaped or V-shaped opening relies on the front comb being inserted into a cornrow that sits firmly against your scalp, not into loose hair or a braid that moves when you turn your head.
Re-braid your foundation cornrows to be tighter against the scalp, insert the front comb into the cornrow at the very front of your hairline where the braid is most secure, and tighten the back straps until the wig feels snug but not painful. If the opening still shifts during the day, add a silicone-lined velvet wig grip under the wig for additional friction that prevents all movement.
Can I Wear a U-Part or V-Part Wig if I Have Thinning Edges or Traction Alopecia?
A V-part wig is safe and strongly recommended for thinning edges or traction alopecia recovery because the wig’s front edge completely covers your natural hairline and places zero tension or heat on the edges. The wig secures entirely through combs in the cornrows and an adjustable band at the back, with no adhesive or tension at the hairline at all.
A U-part wig is not recommended if you have active thinning or breakage at the edges because the U-opening exposes your entire hairline. The exposed edges require daily styling, edge control application, and potential heat exposure, all of which slow or reverse the recovery process. Wait until your edges have fully regrown and regained density before switching to a U-part style.
Do I Need a Wig Cap Under a U-Part or V-Part Wig?
A nylon or mesh wig cap is recommended under both wig types to protect your cornrowed hair from friction against the wig’s wefts and to create a smooth, flat foundation for the wig to sit on. The cap also absorbs scalp oils and sweat, which extends the time between wig washes and prevents oil transfer to the wig hair.
A velvet wig grip band worn over the wig cap adds extra security and prevents the wig from sliding backward throughout the day. The combination of a breathable nylon wig cap underneath and a velvet grip band on top provides the most secure, comfortable, and low-friction foundation for any part wig installation.
The detailed breakdown of nylon, mesh, and dome wig cap types and which provides the best foundation for every wig style includes specific recommendations for part wig installations and how to prevent cap lines from showing through the opening.
Is It Safe to Apply Heat Protectant and Flat Iron My Leave-Out Every Day?
Daily heat application to the same leave-out section is not safe for long-term hair health, even with a heat protectant rated to 450°F. Hair fiber proteins degrade cumulatively with each heat cycle. Research published in the Journal of Cosmetic Science confirms that repeated thermal straightening above 300°F causes progressive loss of the hair’s internal moisture-binding proteins, leading to dryness, brittleness, and eventual breakage at the demarcation line where the leave-out meets the cornrowed hair.
V-part wig wearers avoid this entirely because the heat exposure is limited to 1 to 2 inches of crown hair and the temperature needed is lower: 280-300°F is sufficient because the goal is a smooth part line, not full texture transformation. U-part wearers should limit flat ironing to 3 to 4 times per week maximum, use a protein treatment on the leave-out section every 2 weeks, and never exceed 370°F on relaxed hair or 320°F on natural hair.
Before You Buy: U-Part or V-Part Wig Decision Checklist
Buying Guide
Before You Buy: Part Wig Decision Checklist
Check off each point before making your final decision between a U-part and V-part wig.
The decision between a U-part wig and a V-part wig ultimately comes down to one trade-off: parting freedom and hairline naturalness versus protective styling integrity and daily maintenance time. A U-part wig gives you the most undetectable hairline possible and the freedom to change your part throughout the day, at the cost of 15 to 30 minutes of daily leave-out blending and ongoing heat exposure to your edges and crown.
A V-part wig gives you a 2 to 5 minute daily routine, maximum protection for your edges and hairline, and a style that holds up in humidity and through workouts, at the cost of a single fixed part line and a hairline that is not your own. If you are a first-time wig wearer, recovering from edge damage, or simply want the lowest maintenance routine possible, start with a V-part wig. The comprehensive guide to buying, wearing, and caring for every wig type at every experience level covers the full journey from your first wig to building a rotation of styles for every occasion.
| Photo | Popular Hair Product | Price |
|---|---|---|
|
|
Kkioor 24 Inch Chocolate Brown Human Hair Wig 200 Density Body Wave Lace Front Wigs Human Hair Pre Plucked 13X4 HD Frontal Wig 4# Colored Brown Wig For Women Glueless Wigs | Check Price On Amazon |
|
|
KingSup 613 Lace Front Wig Human Hair Pre Plucked 250 Density 26 Inch 5x5 HD Lace Closure Straight Blonde Wig Human Hair, 100% Real Human Hair without Synthetic Blend Tangle Free Triple Lifespan 3X | Check Price On Amazon |
|
|
WIGCHIC 16" Kinky Curly Half Wig Human Hair Burgundy & Dark Roots | Flip-Over Drawstring | Seamless 4C Hairline | True Length | 3-in-1 Styling | Beginner Friendly (T1B/99J) | Check Price On Amazon |
|
|
Hair Removal Cream for Men & Women: Painless Depilatory for Sensitive Skin & Intimate Areas, Moisturizing with Aloe Vera & Vitamin E, Safe for Face, Underarms, Bikini, Arms (3.7 Fl Oz (Pack of 2)) | Check Price On Amazon |
|
|
ZOOLY PROFESSIONAL Ginger Shampoo and Conditioner Sets 20.3 Fl Oz- Anti Hair Loss and Nourishes Hair Roots, Salon Level Scalp Care for Men and Women | Check Price On Amazon |
|
|
LUSN Baby Hair Clippers with Vacuum, Quiet Hair Trimmers for Kids, IPX7 Waterproof Rechargeable Cordless Haircut Kit for Baby Children Infant | Check Price On Amazon |
|
|
LURA Dual Voltage Travel Hair Dryer with Diffuser,Travel Blow Dryer Mini with EU Plug and UK Plug,Lightweight Portable Hairdryers with Folding Handle,1200W Compact Small Blowdryers for Women | Check Price On Amazon |